Supporting a good cause! MND Research Clinic.

GINA D PHOTO always likes to help a good cause!

MND Charity and HSBC Community Chest held an auction to raise money forMND Research Clinic.

Our studio, GINA D PHOTO helped by donating our full service fee (family photography session including editing) and below you can see the result, photos of this beautiful young family.

MND is a Motor Neurone Disease is an illness that selectively affects motor neurons – the cells that control voluntary muscle activity including speaking, walking, swallowing, and general movement of the body. They are neurodegenerative in nature, and cause increasing disability and, eventually, death.

Visit the website of the MND Research Clinic to find out more and you can also donate to support this important research: www.mndaust.asn.au/Find-help/

IMG_9369BW-webs

IMG_9394-webs

IMG_9404-webs IMG_9405BW-webs IMG_9445-webs

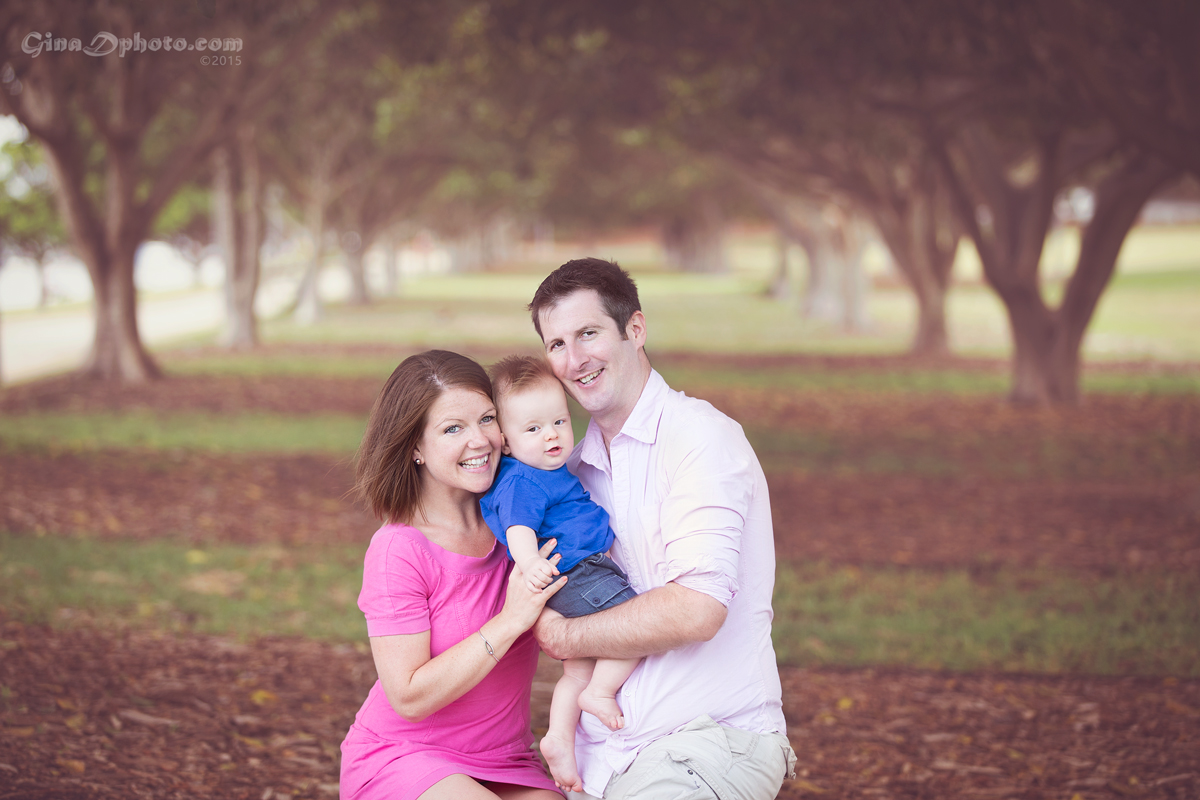
© All photographs are copyrighted by Gina D Photo (Gina J Duckers) 2015

Photo Story: Ralph Lauren Girls

This photo story was taken for the Moda Magazine. The styling was inspired by Ralph Lauren fashion.

HMUA: Kerrie Jane Bailey

Models: Tanya Doherty, Chayde Nettle, Simone Grasso

Styling: Moda Magazine

IMG_4555-layout

Wol-2-ws

Wol-6-ws

Wol-4-ws

Wol-3-ws

Wol-5

Wol-7-web

© All photographs are copyrighted by Gina D Photo (Gina J Duckers) 2014

Photo Story: Elisa Broli Collection

Last year I have been cooperating with an upcoming designer Elisa Broli who was based in Sydney at that time, but lives mainly in Bangkok and travels the world. Model is Sienna Maill and Styling and MUA was done by Elisa Broli. Photos were taken in my studio in Rozelle (Gina D Photo).

Here are some examples of our work together including behind the scenes photos:

EB S-C (1a)Ps EB-S-C-(135)ws

IMG_8799ws EB S-C (112)S

EB-S-C-(240)ws EB-S-C-(245)ws

EB-S-C-(4)webs EB-S-C-(65)webs

EB-S-C-(227)ws IMG_8929ws

© All photographs are copyrighted by Gina D Photo (Gina J Duckers) 2014

How to create a lighting diagram…

Lighting diagrams can be used for many purposes. They allow you to keep track of your lighting set up if you need to recreate the same scenario in the future and can also be used by your assistants to set up a lighting scene that you have in your mind. I am aware of two main websites where you can create a lighting scenario/diagram:

www.strobox.com & www.lightingdiagrams.com & www.sylights.com (here you can also add a comment to your diagram which I find very useful).

I have used Strobox to create my diagram (remark: Online Lighting Diagram Creator and Strobox Community cooperate together in order to offer the photography community the best of both their tools). If you want to give it it go, follow the instructions below:

On the home page click on the Create tab and this will open a new diagram with basic objects (backdrop, subject, flashgun, umbrella and camera). You can choose to clear the diagram above the canvas and start creating your own or simply adjust the given diagram (add/delete objects). To choose new objects place your mouse over the “Lighting Objects’ tab on the left side of the canvas and choose the objects which suit your scenario. There is a disadvantage that you cannot record the distances of the objects from each other, but you can keep those in your notes as the distance is very critical in lighting scenarios. In addition, the light power cannot be logged.

lighting-diagram-1407572847

© Gina D Photo Pty Ltd 2014

Bar Contessa – New York City style Cafe/Restaurant in Balmain

I study for Diploma of Photo Imaging at CATC Design School and currently one of my subjects is Light & Lighting. Our main assignment was choose a local café or restaurant and seek permission from the owner to photograph the interior and exterior. The idea of the shoot was to capture the mood and ambiance of the café/restaurant and to make the establishment look at its best (as for an imaginary magazine review). Whilst the subject matter and the composition of the shots was paramount, the use of light and lighting techniques was of the utmost importance.


Choosing the right place:

It was easy to choose a local Café/Restaurant as I have my favourite place – Bar Contessa which is located in Balmain (I live on the boarder of Rozelle and Balmain). It is open 7 days a week from early morning until 3pm, so people go there for breakfast, lunch or just a coffee. The owner and chef is Marco Adoncello who has Italian roots but has travelled the world and his cuisine is a mixture of American and Italian dishes. Lots of products are sourced from friends and family who operate a range of fruit, vegetable and butcher businesses within Sydney. The free range eggs are delivered directly from a farm on the Hawksberry River. Their bread and sweets are delivered fresh every morning from the Luxe Bakery. The restaurant also offers gluten free, vegetarian and organic food to satisfy every customer. Marco & other people working in the restaurant are very friendly, so getting the approval to photograph my assignment at this place was very easy. I have promised to give them the photos for use for their promotional purposes.

Also you can have a look at their website BAR CONTESSA, or go grab some breakfast / lunch / coffee there!

Planning the photoshoot:

After receiving consent from the owner, I started planning my shoot. The entrance of the bar is facing south and it does not get any direct sun throughout the day. I have decided to shoot in the afternoon between 2-3pm because the bar closes at 3pm but it gets lots of light coming in bouncing from the building across the street to ensure there will be sufficient light to shoot. I did not plan to use any lighting as the shooting was planned during the working hours and I did not want to distract the guests or disturb the functioning in any way. I prepared a tripod and monopod to be able to use longer exposure and avoid camera shake. I decided to use my Canon lens 24 – 105mm as that is the widest lens I own. For interior photos I planned to use 24mm (f 11 -18) and for product photography as coffee, food etc. lower f stop – this lens goes down to f4 only. There might be better lens option for food photography but using one lens only gave me a bit of flexibility to change the subject quickly.

On the job:

As agreed with Marco (the owner & chef) I arrived on Sunday afternoon. I ordered a burger which was one of my subjects to shoot (see below) – have to admit it tastes as well as it looks. The plan was to get 3-4 photos for this assignment but I have added a bit more to show more of the work I have done. I used a tripod for the interior photos and the product photographs were taking while hand holding the camera. Even though it could be better to use a tripod, I did not want to attract too much attention & disturb the functionality of the restaurant. Tripod for the interior photographs was not used only to let enough light in due to limited lighting conditions but also to blur some movement (which makes the place look busy and people should not be recognised on such photos unless they agreed to it). I have tried to include guests in the background in some of the food/coffee photographs to make the photos more life, social (photo number 2 and 4 below).

Below are the results including settings. Hope you like them. I would like to thank Marco for the opportunity (and supplying me with different coffees for my shoot, especially the smiley face – Babyccino (Photo Nr.7).

1. Settings: f16, ISO 320, 1/2sec.

1. Settings: f16, ISO 320, 1/2sec.

2. f4, ISO 320, 1/10sec.

2. f4, ISO 320, 1/10sec.

3. Settings: f16, ISO 100, 3.2sec.

3. Settings: f16, ISO 100, 3.2sec.

4. Settings: f4, ISO 640, 1/60sec.

4. Settings: f4, ISO 640, 1/60sec.

5. Settings: f4, ISO 1000, 1/80sec.                                                                                                                                                                                     6. Settings: f4, ISO 400, 1/125sec.

5. Settings: f4, ISO 1000, 1/80sec.                                                                                                                                                                          6. Settings: f4, ISO 400, 1/125sec.

7. Settings: f4, ISO 400, 1/80sec.

7. Settings: f4, ISO 400, 1/80sec.


© Gina D Photo Pty Ltd 2014


Photo Story: Bridal Editorial 1

I am currently cooperating with two amazingly talented women: make-up artist Marie Sarkissian Lattouf and hair stylist Ema Milgate on bridal editorial project (photography and styling by Gina J Duckers). The purpose of this project is to create editorial bridal photoshoot presentation of different hair styles, make-up, accessories, dresses and bridal styles. The model on these photos is Julie Myra. Below is the photo story including preparation in the studio and the results of our work. Thank you ladies for amazing day. I am looking forward our future projects (next bridal editorial photoshoot is coming soon – in May).

studio-collage-bridal-ws

IMG_1173wsIMG_1187wsIMG_1249wsAnd the result of our work

Untitled-2wsIMG_1323webSr

Untitled-3© All photographs are copyrighted by Gina D Photo (Gina J Duckers) 2014

Photo Story: Sydney Fish Market

I am a big fan of Sydney Fish Market and therefore I have shot a photo story there. I really enjoy to prepare fresh seafood or just to go for a lunch there. The story takes us through the day – how fish are prepared for the display (some of them still alive), how busy the market is including the packing of the purchased products, some people enjoying their lunch at the market and at the end, after taking orders for the next day, preparing for another early morning at the sea…. and the next day – all over again….

A 20140419_FM_0805w B 20140419_FM_0799w C 20140419_FM_0842w D 20140419_FM_0820w E 20140419_FM_0837w F 20140419_FM_0848w G 20140419_FM_0809w H 20140419_FM_0835w I 20140419_FM_0853w J 20140419_FM_0827w


© All photographs are copyrighted by Gina D Photo (Gina J Duckers) 2014

Activity 10: Interview questions for a photographer (VC)

The objective of this activity is to gain experience in ways to understand other photographer’s work and post a minimum of 6 question on the blog (the questions should invoke extensive answers, not one word yes or no in order to gain a real understanding of another photographer’s work and the for reason for creating it).

1. Where do you get your inspiration from?

2. What is your main suggestion for setting up a composition and lighting?

3. What do you think is the most important element to attract new clients?

4. What was your most difficult shoot and how did you overcome the obstructions?

5. What was the most influential moment of your career that has affected your business growth?

6. What is your approach to social media and how do you engage your audience?

Activity 9: Moral Rights and Copyright in Photography (VC)

The objective of this activity is to develop an understanding of moral rights and copyright in regards to the photographic industry.

copyright-petra

 Scenario 1:

Use of a photo on someone’s blog without giving me a credit for being the original photographer

To use someone’s photograph it is still publishing the photo online. And the photographer is entitled to moral rights, therefore he should be credited by the photo. Blog is followed by different people and therefore this is a published work. I would suggest to contact the author immediately with the reference to the Australian Copyright Council which states that when the work is published its author has the right to be attributed unless subject to any consent or reasonableness defence. Blog does not have to be set up for commercial purposes but the user should still respect moral rights of authors of photographs he is using.

Scenario 2:
Wedding photos shown on a display of a printing shop without my consent (photographer) and the owner of the shop is claiming that the couple shown on the photograph agreed for this photo to be on display.

When a photographer is commissioned to take any domestic photos (wedding, engagement, other events, portrait, etc.) then the customer owes the copyright unless it is stated otherwise in the Service Agreement signed between the photographer and his client. If the agreement gives any specific rules how displaying and publishing a photograph should be treated, then the customer might have breached the conditions agreed. If the agreement does not allow publishing without crediting the photographer, then I would ask the owner of the shop to add my name (name of my studio) on the photograph. There should always be a signed agreement with the client to avoid situations like this and have some documentation stating the rights of each party clearly.

Scenario 3:
Advertising photo being used for more than agreed purposes (on a tram, in international magazines)

In this third scenario the photographs made for a client are used for other purposes then agreed in a signed Service Agreement. This is definitely a breach of the law and I would immediately get in touch with my lawyer to initiate an investigation. Especially for commercial purposes there are strict rules clearly stated in a contract and governed by the law. After the investigation I would request that the layer contacts the company and start a mediation. If the company would not settle for some financial compensation and agreement to take the photographs off or pay for their future usage, this matter should be taken to the court.

For more information about COPYRIGHTS of not only photographs please visit the following website: http://www.copyright.org.au/find-an-answer/browse-by-what-you-do/photographers/
 

Activity 2: Framing and Rule of Thirds in Photography (VC)

Image

Rule of thirds is one of the main rules used in arts and photography. This rule has been introduced in the 18th century by John Thomas Smith in his book called Remarks on Rural Scenery. He is describing the balance of the picture and how light and dark parts of the picture should be harmonized. From his point of view, in a landscape picture, 1/3 of the picture would be represented by the ground or water and remaining 2/3 would be filled with sky. The bottom part (ground and water) is then also divided by the Rule of Thirds where 1/3 is represented by ground (land) and remaining 2/3 by the water.

Basically, with the Rule of Thirds, the picture / photograph is divided by 4 lines – two horizontally and two vertically which split the picture into 9 grids. The points of interest should be placed on one of the intersections or combination of intersections.

For example in seascape / landscape photography you have to decide if your main focus is the sky or the land / water. If the focus is on the sky, then the horizon should be placed close to the upper third and on the contrary, if the main focus is the water then you should be placing the horizon closer to the lower third of the photograph.

IMG_9283rules-of-thirdsIn portrait photography, the same rules apply. When you take a portrait, you should be following the guidelines also, your subject should be placed on the intersections (2 or 4) where the top two could be where the eyes of the subject are. You can place your subject on two intersections on the left third of the picture, if you are taking a landscape photo having the person placed on the left/right on the points of interest.

© Gina D PhotoYou should always prevent to divide the picture in two half right in the center and placing your point of interest in the middle on no intersections. It creates a very static picture without tension and interest. The theory is that our eye is naturally inclined to those points of interest created by diving picture by the rule of thirds.

Below is an example of a picture (product photography) with a composition that is a typical example of breaking the rule of thirds by placing the subject in the center avoiding any interaction with the points of interests. Second photo has been taken with the respect to rule of thirds by placing the product on the intersection.

© Gina D photo© Gina D Photo© All photos are copyrighted by Gina D Photo Pty Ltd